
🎥 How to install jute webbing
Antonia MarinoIf you're a passionate DIYer looking to breathe new life into your worn-out furniture, installing jute webbing with a web stretcher is a fantastic way to revive and enhance the support of your upholstery. This step-by-step guide will walk you through the process, helping you achieve professional results without the need for expensive tools or professional assistance.
Tools and supplies needed:
Jute webbing (10lb for seating)
Web stretcher
Tack hammer
15mm Tacks
Scissors
(Optional: Staple gun with 14mm staples)
1. Place one end of the jute webbing on the frame furthest from you, folding the end over. Use four 15mm webbing tacks, or 14mm staples, to secure in place. Avoid hammering them in a line, but stagger in a zig-zag fashion.
2. Without cutting the jute webbing, position your web stretcher to pull the webbing. (Different styles of stretchers have different methods of use).
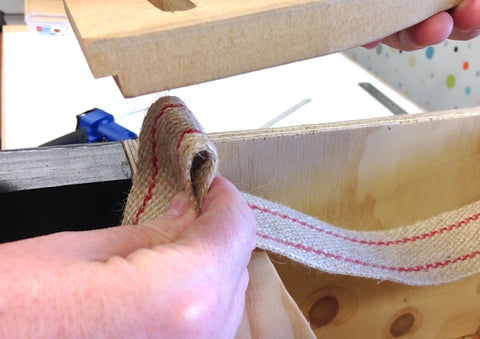
3. Gently stretch the jute webbing using the webbing stretcher, maintaining even tension across the entire length. Tap the webbing, it should sound taut like a drum.
4. Secure the stretched end with the tacks or staples. Cut the end, and pop in two tacks or staples to hold that end in place.
5. Continue the stretching process, securing the jute webbing with staples along the frame. Ensure that the webbing is evenly spaced and tightly stretched for optimal support. The spacing will vary depending on the application, but in many cases seating have 50mm spacing with horizontal and vertical straps.