
How to replace pre-woven cane mesh on a seat
Remove old mesh and clean up groove.
- Use a craft knife to score around the outside edge of the wedging spline.
- Use a hammer and a narrow chisel or flat headed screw-driver (which is no wider than the groove) to remove the wedging spline from the groove. Sometimes soaking the old mesh makes the job easier.
- Remove the old mesh, being careful not to damage the wooden frame.
- Clean out the groove using the chisel or screwdriver. Lightly sand any rough edges.
Prepare cane & spline
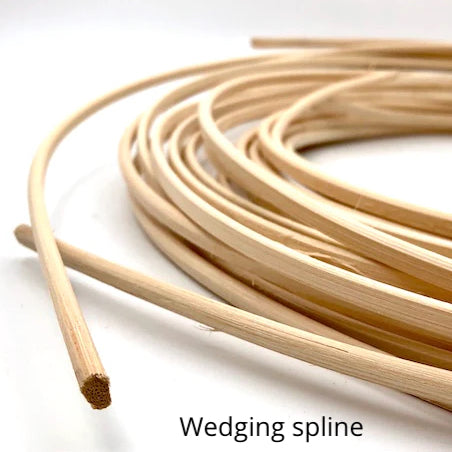
- Measure the width of the groove, and select wedging spline that is about 1mm narrower.
- Cut new cane mesh so it's large enough so it will extend 2cm beyond the groove.
- In a tub of water, soak the cane mesh and wedging for at least 20 minutes, or until it is pliable.
- Cut four short pieces of wedging spline, approx 4cm long. We will use these to temporary hold the mesh in place when we start installation.
Placing the cane mesh
- Lay the mesh shiny side up onto the seat and square it up so each side is straight and even.
- Starting at the front, remove any horizontal cane strands that are laying on the outside edge of the groove.
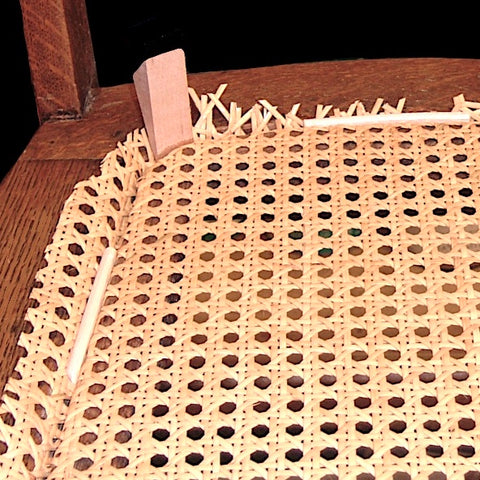
- Secure the middle section of cane in the groove using one of the small pieces of holding spline, or a thin wooden wedge.
- Repeat step 2 and 3 on the back of the seat, then on either side, removing excess cane strands as necessary. You might need to help feed the mesh into the groove with your other hand.
- Using a flat tool, such as one half of a wooden clothes peg, a metal scrapper or a wooden wedge, to press the cane into the rest of the groove. You might need to help feed the mesh into the groove with your other hand. For round chairs, remove excess diagonal cane strands before pressing in.
- If neccessary, use a few more wedges or spline to hold in place.
Preparing groove for wedging spline
- Using a craft knife, carefully cut away the excess mesh about 2mm shorter than the outside edge of the groove. Basically, you don't want the raw edge of the mesh to be showing when the spline is fitted.
- Apply a thin line of pva glue in the groove.
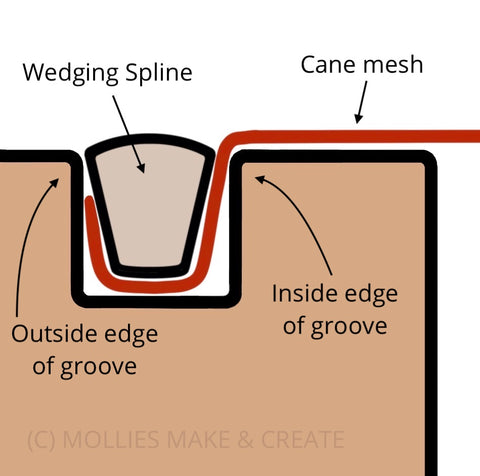
Placing the wedging spline
- For round chairs or corners, check if the wedging spline will go around without breaking, otherwise soak your spline for 10mins or until pliable.
- Cut the end of the wedging spline at a neat 45 degree angle.
- For rounded seats, start at the center back. Holding the spline with the narrow end facing into the groove, place the end of the spline into the groove, and tap carefully with a small mallet and continue around the whole chair. Cut the end at a 45 degree angle to finish.
- For square seats, cut the spline to fit each side, trimming the ends at a 45 degree angle. Tap into place with a hammer and repeat on all sides.
- Use your wooden wedge and hammer to gently tap the wedging spline down firmly into the groove.
Finishing off
- Allow the mesh to dry at least 24 hours to allow the fibres to shrink and tighten.
- Finish off with shellac, stain, varnish or paint.